Tuesday, December 22, 2015

A little unfinished business...

I was rolling a batch of ginger and macadamia balls tonight and jigging to a happy Christmas tune when it hit me.

Not a rolling pin, just the memory that weeks ago I promised some Instagram friends that I'd share my recipes here for Lemon Passionfruit Slice and Apricot Oat Bars - and I forgot!

So here we go...
 Lemon Passionfruit Slice


Ingredients
1 cup self raising flour
1 cup desiccated coconut
1/2 cup caster sugar
125g butter, melted
395g can sweetened condensed milk
1/2 cup fresh lemon juice
1/4 cup passionfruit pulp, plus extra to serve

Method
Preheat oven to moderate, 180 degrees C. Lightly grease an 18cm x 28cm lamington pan. Line base and sides with baking paper, allowing paper to extend 2cm above the rim of the long sides.

Sift flour into a bowl. Stir in coconut and sugar. Make a well in the centre of the dry ingredients and add the melted butter, mixing well.

Press firmly into the base of the prepared pan. Bake for 10-12 minutes, until slightly golden.

Meanwhile, in a bowl combine condensed milk, lemon juice and passionfruit. Pour over base and bake for a further 8-10 minutes. Allow to cool and chill overnight.

Lift the slice from the pan. Peel away the paper and cut into 24 squares. Drizzle with extra passionfruit before serving.

Apricot Oat Bars


Ingredients for Base
1 cup Plain Flour
1/3 cup sugar
1/2 cup rolled oats
4 oz butter

Method
Melt butter and combine with the remaining ingredients. 
Press over the base of a greased 9 inch square pan. Bake in moderate oven for 15 minutes.

Ingredients for topping
6 oz chopped dried apricots
2 eggs
1 cup brown sugar
1/3 cup Self Raising flour
1 cup coconut

Method
Cover apricots with hot water, stand 5-10 minutes, then drain.
Beat eggs well,and combine with remaining ingredients.
Spread topping over the partly-cooked base, and bake in a moderate oven for a further 20 to 25 minutes (until firm to the touch).
Cut into bars when cool. Makes 24.

  If you've made it this far without falling asleep you deserve a reward, so here's the recipe for the Ginger and Macadamia Balls I was making tonight.


Ingredients
100g raw macadamias
1 x 250g packet of Gingernut biscuits
3/4 cup sweetened condensed milk
1 tablespoon Golden Syrup
90g butter
1 and a half cups coconut

Method
Place nuts on a baking tray and bake in oven 200 degrees C for 5 to 6 minutes until golden. Roughly chop nuts.
Crush biscuits in a food processor. Place biscuit crumbs in a bowl with the chopped macadamias.
Place the condensed milk, Golden Syrup and butter in a Pyrex jug and microwave on High for 2-3 minutes or until the butter melts.
Pour this mixture over the crumb/nut mixture and mix well.
Roll teaspoons of mixture into balls, roll in coconut. Refrigerate until firm.

Almost no-bake - if you don't count toasting the macadamias.


Sunday, December 20, 2015

Delightful distractions

I know, I know. Long time, no me!

Life, in all its richness, has temporarily intruded on my blogging time and before I continue I'm going to break the number one rule for bloggers and apologise for the hiatus.

What could possibly have taken my attention all this time? Well, here's the thing.

I've been...

* Admiring Princess 1 when she became the first member of our family to sing on stage at the Sydney Opera House, as part of the huge combined choir performing at the Ryde Schools' Spectacular. I was so proud of her!


* Appreciating the magnificent star jasmine vines and purple jacaranda trees that brighten Sydney at this time of year.

This is our local barbecue area, and general neighbourhood meet-up spot.

I felt very honoured that the City of Sydney chose to share, in its Instagram feed, this photo I took of jacaranda "snow" on a Zetland street.

Tote Park, Zetland.

The Memorial Garden at St Mark's, Darling Point.


* Cultivating my tiny balcony garden, and enjoying the small patches of early summer colour from my bougainvillea, diplodenias, lavender and convolvulus. 


* Photographing some of the dramatic storm fronts that sweep into Sydney at this time of the year. From my balcony I get a spectacular view of the thunderous clouds, and sometimes even a spectacular light show!


* Attending a small 50 year school reunion of Sydney Girls' High leavers. My cohort has never been keen on large, formal reunions (we waited 30 years before we had the one I organised), so there was something warm and comfortable about this meet-up of around sixteen of us for lunch at the Chiswick Restaurant at the Art Gallery.


* Stitching this set of latte coloured mug mates for a friend to give her daughter-in-law.


...and these as Christmas gifts for some friends.


... and these softies for Anglicare's Toys 'n'Tucker Christmas appeal.


... and quietly making progress with the hand quilting on this special quilt I'm finishing on a friend's behalf.


* Finally - and most importantly - I've been treasuring the opportunities I get to spend with my other two grandchildren, Mr J and his new baby sister Princess 2.


More soon!

Friday, November 13, 2015

The BIG Reveal!

My version of Jen Kingwell's My Small World quilt is finished, quilted, bound and gifted. Yay!


But (for a change) this post isn't about the quilt. It's all about the recipient, my brand new granddaughter!


Sarah and I couldn't wait to give her some welcoming cuddles.


Cute as a button, and every bit as beautiful as her cousin, The Princess, she is definitely another little Princess! So, in future, on my blog, these precious little people will be known as Princess 1(formerly The Princess), Mr J (now a proud Big Brother) and Princess 2 (his baby sister).


The safe arrival of a baby is always a reason for rejoicing, but this little one's birth upsized that joy for our family. Two years ago I wrote this blog post. It was the second hardest I've ever written, after the hardest one a year before. 

Watching and waiting while this little one was being formed inside her mummy was like holding my breath. After all, Harry's gestation had gone smoothly too, giving no hint of the tragedy that was to come. I didn't dare share with more than a few close friends the news that another bub was on the way. Finally, with her safe arrival, I felt I could at last exhale with relief and share our happiness with the world.

Harry will always be part of our family, even if he isn't here to hug, and my heart is bursting with thankfulness to God for our new little baby girl.


Wednesday, November 11, 2015

Tips for My Small World Quilt (Part 3 - The Rainbow, Orange Peels and Clamshells)

If you're like me, you probably finished Section 3 of your My Small World Quilt and, bedazzled by the sweet rainbowy goodness of section 5, leapfrogged over the space on your design wall where Section 4 should go, to work on this colourful little corner of the world in the top left hand corner. 


It's certainly my favourite "neighbourhood" in My Small World.  

I've previously explained how I worked the Half Dresden, the Hexie Hillock and the New York Beauty Arc, but I've left you waiting far too long before explaining briefly how I approached the rainbow.

1. The Rainbow
Once again, Floriani Stitch and Wash Fusible came to the fore. Using the templates for the arcs provided in Jen Kingwell's pattern, I cut out the skinny, curved pieces and ironed each one onto a different fabric. 


Next I cut these into semi-circular shapes, folded back my seam allowances and used my Sewline glue pen to finger press these in place, ready for appliqué. This is how the pieces looked from the back.


And this is how they looked from the front.


I took the second largest semi circle (the large spot in my picture), placed it on top of the largest semi circle (the rainbow stripe), and pinned it in place with my tiny appliqué pins.


After appliquéing it to the stripe, I turned my work over and carefully cut away the striped fabric from behind the spotted one. I repeated this with each subsequent arc of the rainbow, in each case trimming away the excess fabric from behind the appliqué


Finally, this was how the finished rainbow looked from the front.


And here's the back view, showing those strips of Floriani Stitch and Wash Fusible stabilising the arcs.


2. The Orange Peel Blocks

Again, I just traced the petal shapes from the templates in the pattern, and ironed the petal shapes onto the wrong side of the different coloured scraps I was using. Then I cut out the shapes, leaving an approximate 1/4 inch all around. I folded that seam allowance back onto the Floriani and, using my glue pen, I glued them down read to hand appliqué. Very simple.


3. The Clamshells 


Yes, *again* I used the Floriani method, but I only folded back the fabric on those main curved edges, not the clamshell "stems". The trick to success with this block of My Small World is to first appliqué the bottom line of clamshells to the background fabric. Again, there's no need to do anything to those stems.

Once this row is firmly stitched in place it's easy to just stagger the positions of the clamshells in the top row so that they alternate with the bottom ones and cover the stems completely.

Of course there are other methods, but this is what works for me. 

I hope you're sharing your progress pics on Instagram :-)

Thursday, October 29, 2015

Sewing Circles

At this month's workshop some of our St Mark's Quilters were sewing circles, baby Dresden circles.


Armed with a plastic wedge templates, bamboo skewers, and a few useful tips from me, our lovely ladies were soon creating colourful little circles of awesomeness.


Look at Di C's first Baby Dresden!


After chain piecing her tiny wedges Gillian discovered another use for them :-)


Our Queen of Blue (Di B) made this one.


Meanwhile Susie pin-basted this Blanket of Love and started to free motion quilt it. 


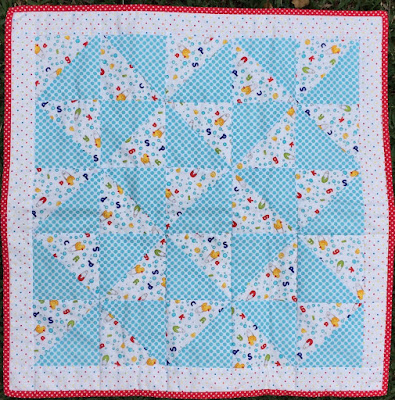
And these finished Blankets of Love, bound for RPA Hospital's Newborn Intensive Care Unit, were added to our growing collection.

Made by Susie


Made by Barb

Made by Barb

Made by Di B

Made by Margaret


Yes, we do enjoy ourselves at our monthly workshop!


Do you belong to a sewing circle? I'd love you to tell me about it.